05a - Installing Python environment
08a - Installing Python environment
Python versions: Python 3 or Python 2?
Definitely Python 3! As of 2020, Python 2 has been marked as obsolete. Some software projects are still relying on Python 2 due to compatibility reasons, but all new code and projects should be created in Python 3.
Installing python3 interpreter
Microsoft Windows 10
Warning Installing Python from Microsoft Store requires updating the system to the newest version. In most cases, running Windows Update built into the system is enough. In case of trouble downloading Python from Microsoft Store, try updating the system manually using Update Now button on the following website: https://www.microsoft.com/en-us/software-download/windows10
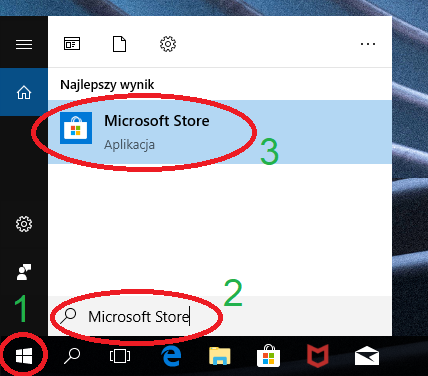
Python3 is available as an app in official Microsoft Store. To launch it, run Microsoft Store: open Start Menu (1), start typing Microsoft Store (2), and choose the application from search results (3).
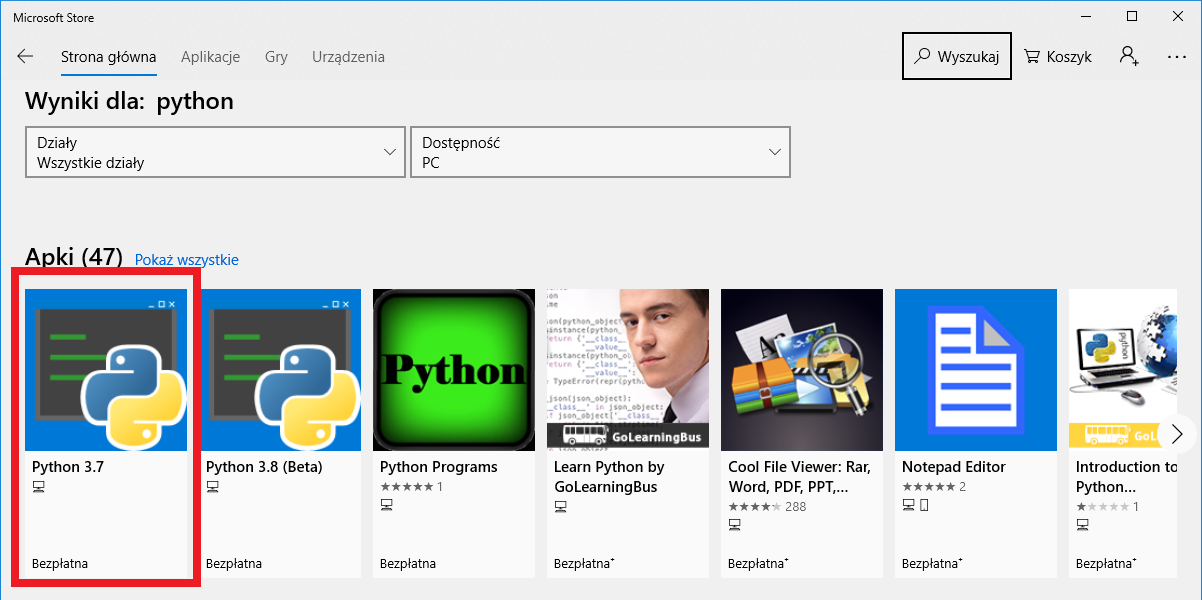
Using search bar in top right corner, search for python.

From search results, ini Apps category, pick Python 3.8.
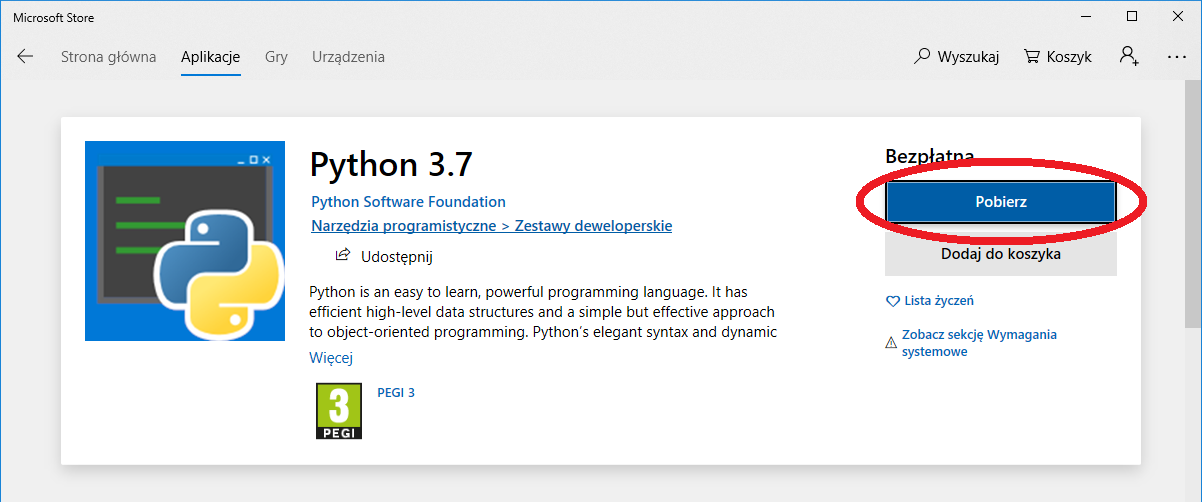
Kliknij Download. If you aren't logged into a Microsoft account you will be asked to log in, but you can skip that by clicking No, thanks.
Wait for the installation process to finish and close Microsoft Store.
Linux Ubuntu 18.04
In Ubuntu, starting with version 18.04, Python 3 is installed by default. However, installation of pip3 package manager is necessary.
Launch the terminal emulator from app menu or by pressing Ctrl + Alt + T. Next, run the following commands (copy/paste them or type in manually and execute by pressing ENTER):
- Update the package repository data. You will be asked for a password, enter your user account password and confirm by pressing
ENTER. The password will not be echoed in the terminal.
sudo apt update
- Install pip package manager for Python 3:
sudo apt install python3-pip
macOS
It is possible to install a software package containing Python downloaded from python.org, however, it is convenient to install it from MacPorts repository, together with XCode programming environment and tools, by completing following steps:
If you don't have XCode installed:
Using App Store, install XCode programming environment: [AppStore link(https://apps.apple.com/us/app/xcode/id497799835). A free Apple ID account is necessary.
Launch XCode for the first time (using Launchpad or Spotlight), which will prompt you to install additional tools. Enter user password, and after the installation is completed close XCode and go to step 3.
If you already have XCode:
- Launch Terminal (using Launchpad or Spotlight).
In the terminal, execute the following command (copy/paste it and confirm with ENTER):
xcode-select --install
Accept software installation, close the terminal after the installation completes.
Download newest MacPorts installer for the system version you are using from https://github.com/macports/macports-base/releases/. You can check which operating system version you have by opening Apple menu → This Mac. For example, for macOS 10.14 Mojave, at the moment, the newest installer is MacPorts-2.6.1-10.14-Mojave.pkg. Run the installer and leave all default options, clicking Continue at each step. Authorize the installation with your user account password when asked.
Open Terminal again ponownie aplikację terminal. Run below commands one after another, confirming with
ENTER. During the first command, you will be asked for your user account password.
Update MacPorts repository data:
sudo port selfupdate
Install Python 3.8 and pip:
sudo port install python38 py38-pip pip_select
When asked for confirmation, press ENTER.
Select Python 3.8 as default Python 3 system interpreter:
sudo port select --set python3 python38
and pip 3.8 as default when running pip3 command:
sudo port select --set pip3 pip38
Installing packages for Python 3
Clean Pythona install provides basic language support. Although. Pomimo, że jest to rozbudowany i wielozadaniowy język skryptowy możliwe jest rozszerzenie jego funkcjonalności poprzez instalację pakietów.
A wide range of packages exists, starting with simple ones, such as tqdm for progress bar display, to complicated frameworks , e.g. PyTorch for deep neural network support.
During classes, the following packages will be used:
- NumPy - array and matrix support (provides MATLAB-like functionality),
- Matplotlib - for data plotting.
Package installation is most often done with Python package manager called pip, using command line. Install above packages by following the steps below:
Microsoft Windows 10 and Linux Ubuntu
- Run command line:
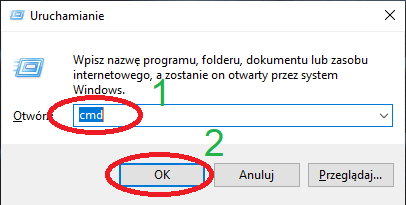
- Windows 10: press
Windows+R. A Run window will appear. Type cmd (1) and confirm by pressingENTERor OK (2).
Linux Ubuntu: press
Ctrl+Alt+T.macOS: press
Cmd+Space, start typing terminal. Open Terminal app.
- In the terminal, run the following commands (copy/paste and execute by pressing
ENTER):
Update pip itself:
pip3 install --upgrade pip
Install required packages wykorzystywane na zajęciach pakiety:
pip3 install numpy matplotlib
Installing PyCharm
PyCharm is an integrated programming environment designed for Python and developed by JetBrains. The software is cross-platform and can be used on Windows, GNU/Linux i macOS.
Microsoft Windows 10
Go to webpage: https://www.jetbrains.com/pycharm/download/#section=windows
Download Community version by clicking black Download button:
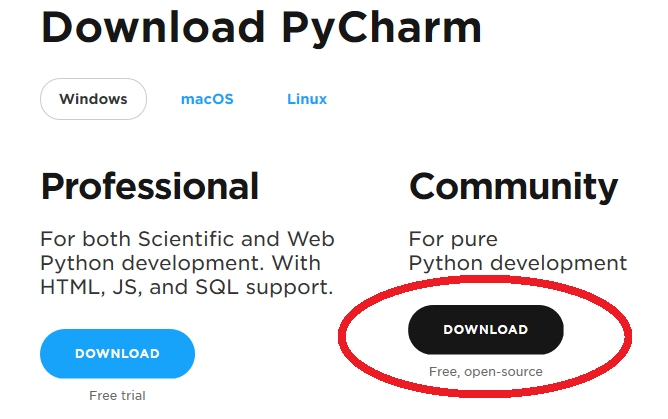
- Run the downloaded installer. Leave all default options.
Linux Ubuntu
Open terminal by pressing
Ctrl+Alt+T.Run the following command:
sudo snap install pycharm-community --classic
macOS
Go to webpage: https://www.jetbrains.com/pycharm/download/#section=mac
Download Community version by clicking black Download button:
Mount (open) downloaded disk image and copy PyCharm CE app to Applications directory.
PyCharm first run and configuration
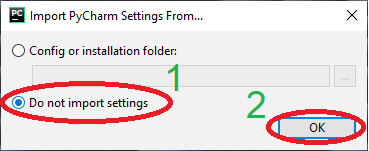
During first launch of PyCharm, you will be asked if you want to import environment settings. Select Do not import settings (1), and then OK (2):
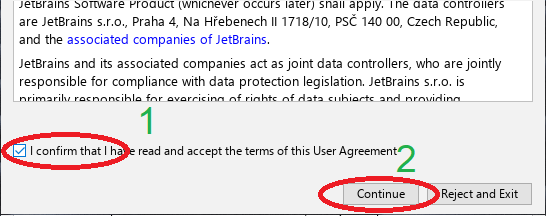
Accept the license (1) and click Contuniue (2):
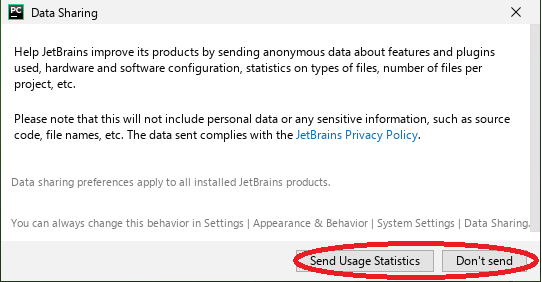
Decide whether you want to aid in PyCharm development by providing usage reports. Select Send Usage Statistics or Don't send:
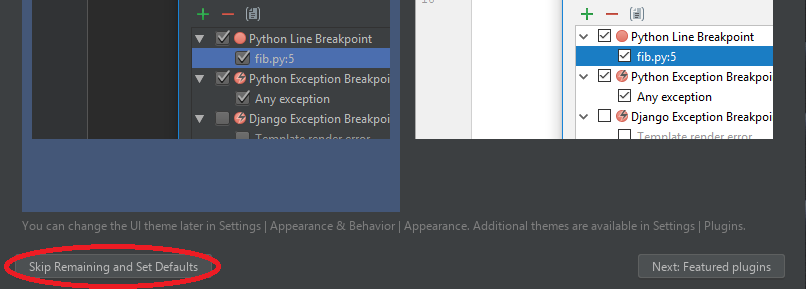
You can customize the user interface. To leave default settings, click Skip Remaining and Set Defaults:
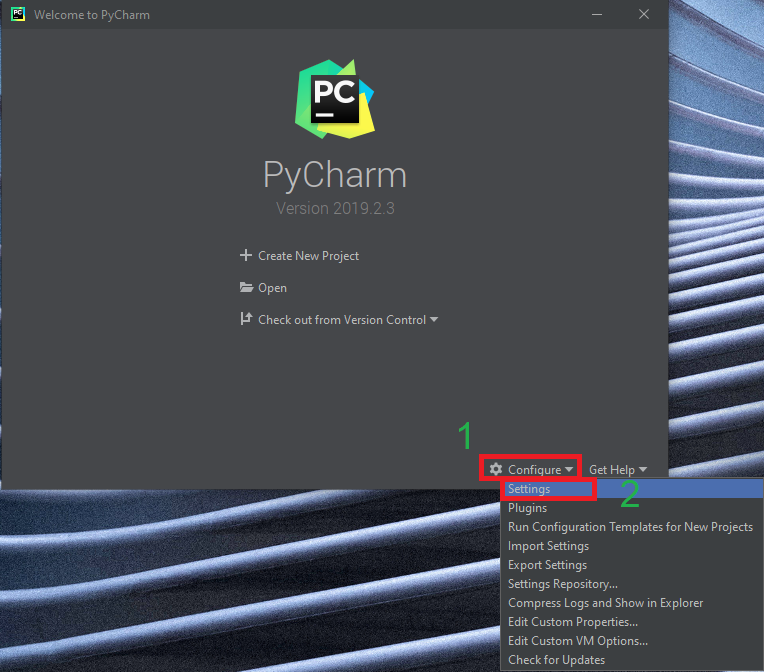
In the following steps configure default Python 3 interpeter used for new projects. Click Configure (1), and then Settings (2):
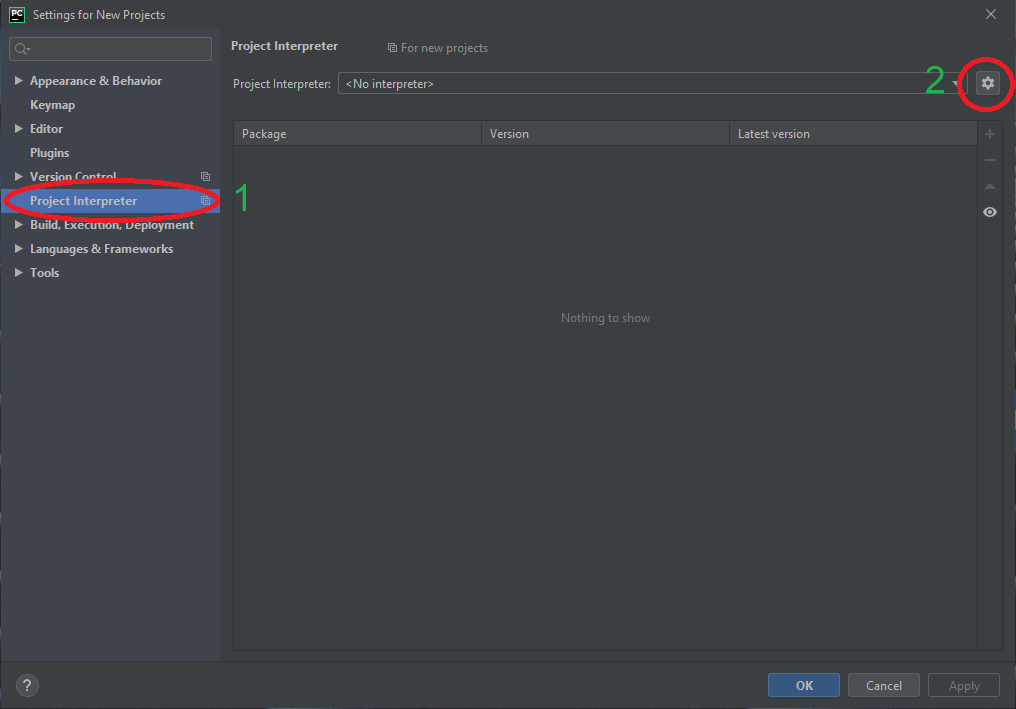
Go to Project Interpreter tab (1), and click the gear in top right corner (2):
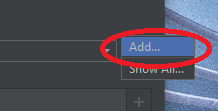
Form the pop-up list select Add...:
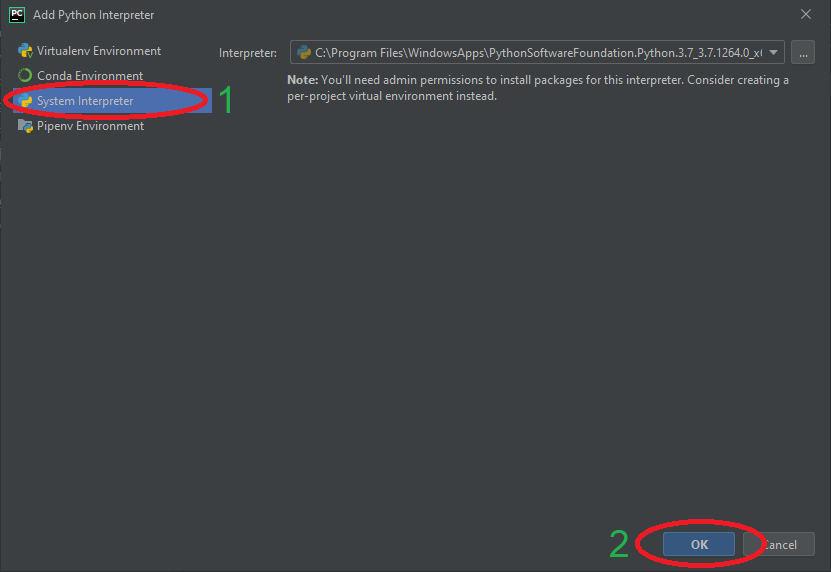
Select System Interpreter (1) tab and confirm with OK button (2):
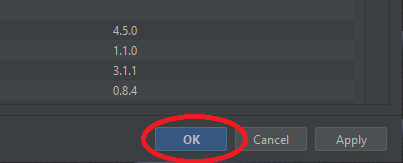
After a short while, the interpreter will be added and its installed packages list will be displayed. Accept by clicking OK:
Authors: Tomasz Mańkowski, Jakub Tomczyński